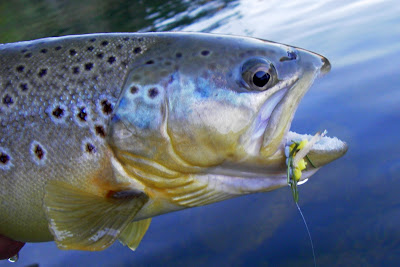
It's been a while since I have done a step by step tutorial here for a fly pattern, and since it is hopper season, I thought I would share my favorite pattern to tie and to fish this time of year. The creator of this fly might disavow any connection to the abomination I tied up here, but I like the pattern a lot. You can check out the tutorial for the original Hopper Juan from the creator of the fly himself here. Here is my version with the main difference being some extra legs.
 |
| Tie on the bottom layer first then at the tie in point I dab on some Krazy Glue. Then stick on the top foam and tie it down. |
 |
| After 3-4 securing wraps I dab some more glue on the hook shank then advance the thread to where I want the next segment. I tie in both layers at the same time here. |
 |
| Then I again dab some more glue on the hook shank and advance the thread to make another segment. |
 |
| At this segment I tie in some Elk Hair. Here I used Bleached Yearling Elk. |
 |
| Then on top of that I tie in a few strands of Krystal Flash and trim them just a bit longer than the hair. |
 |
| Next place another dab of glue on top of the bottom layer of foam and push the top foam down on it and tie it off at the eye. |
 |
| Then place another dab of glue on top of the head of the fly and advance the thread back one segment. Then fold the excess foam from the top layer back over the body of the fly |
 |
| take one of the rubber legs forward from each side and tie it down at this segment. |
 |
| Whip finish and then trip the excess foam going back over the body, and trim the rubber legs to the desired length and you are done. |
 |
| What the fish see |
 |
| What the birds see. |
 | ||
| It's trout candy during hopper season. |
 |
| This one got munched pretty good this morning... |
 |
| ...but it will still fish! |


2 comments:
Benji,
Nice work. It's nice to see other people's way of tying this fly. I like it and the fish like it too. I hope for lots more fish on this pattern. Thanks for tying it up.
Hopper Juan
Thanks Juan, your hopper has been killing it for me this year. Great pattern.
Post a Comment